


Why use video?
Using videos in education can inspire, inform and engage. It can show things that may be difficult to imagine through other means. It’s great for those students who are auditorily or visually stimulated.
Some things to consider when using video:
- Keep it short and simple.
- Use visual cues and diagrams.
- Provide opportunities for active engagement and reflection.
- Check understanding and knowledge.
- Segment videos into sections or chapters.
- Be authentic, like you would be in a classroom.
How do I record a video?

Self-Record
The technology is now available for you to record your own videos using software, such as Zoom. If you are feel confident, you can go ahead and create your own content.
Videos should be no more than 10 minutes. You should ‘chunk’ information accordingly.
You need to use the UoM Presentation Slides.
If you just want to record clips within a PowerPoint presentation, you should follow the guidance within Powerpoint & Windows 10: A How-To Guide.
To record a video using Microsoft Teams desktop app. Sign in, then start a meeting with yourself. Go to Calendar, select Meet now > Start meeting. Record your meeting.
If you are using Teams on a phone, or tablet. Open the Teams app. Select Meet, or Calendar > Meet now. Start the meeting. Record your meeting. Use Share if you want to share content.
You can play, share, and download a meeting recording in Microsoft Teams.
We have more information on this within the Using Zoom area of the staff pages.
Just set up a Zoom meeting, set to record in the cloud, then deliver your presentation using ‘Share Screen’. See the Using Zoom to Record Presentations UoM guide for more information.
Once you have recorded your presentation, if you are happy with it, upload it directly onto the University Video Portal.
Go to Recordings in the Zoom website menu and check the recording has been saved. It will probably still say “processing” and you may have to wait a while until the recording is ready. Once the recording is complete, you can share it.
- Select the ‘Share’ button by the recording name. A pop-up will appear:
- Select the following:
- Share this meeting publicly – ON (the share will create unique ID which is impossible to guess)
- Viewers can download – ON (this will allow the person you are sending it to store a copy)
- Select ‘copy the information to your clipboard’.
- Select Done.
You can then share this information with the person that you want to be able to access your recording. The copied information will look like this:
Topic: My Recording 2
Start Time : Apr 29, 2020 12.00 PM
Meeting Recording:
Trimming the beginning and end of your video is really simple if you use tools such as the Quicktime ‘Trim‘ function (Mac O/S).
If you want to edit the video and add extra effects and transitions, there are a number of editing tools. Check out this guide from the FBMH eLearning Team for more information.
If you want MBChB eLearning to edit your video, please send the link to the recording in Zoom, or download the .mp4 file and send that to us via a Dropbox link or Zendto to MBChBeLearning@manchester.ac.uk and include information in relation to where the presentation needs editing (e.g. “Please Remove the first 20 sec OR, remove the section from 1.20 to 1.30.”).
The edited video will be sent back to you, for you to keep a copy. It may also be uploaded to the Video Portal for use within 1Med Learn, if instructions are provided.
You should keep a copy of any video you produce. We recommend using SharePoint or Dropbox. Please adhere to the Acceptable use of IT policies.
FBMH eLearning has some advice and guidance on how to do this on their staff website. Here you will find tips for your set up and using Zoom and other software to record yourself as a ‘talking head’. There is also guidance on how you can edit your videos.
The portal is secure, reliable and provides captions for your video.
- Go to https://video.manchester.ac.uk/
- Login using CAS (Authentication)
- Go to My Video
- Upload your video.
- We recommend uploading to the Course/Organisation ‘Faculty of Biology, Medicine and Health’ and making the video Visible to ‘Only Me’.
- Once the video has been uploaded and processed, you will recieve a notification email with a link to view the video.
- You can also select ‘Switch to mange videos’ and select the video you have just uploaded.
- Select ‘Options’, then Video Info.
- Copy the embed code that appears.
You can then send this code to the eLearning Team.
Please note that lecturers are responsible for ensuring the accuracy of the subtitles and transcript within their videos. You can download and edit these within the Video Portal.
The portal is secure, reliable and provides captions for your video.
If you have access to Canvas, you can use Canvas Studio to record and host videos. Screencast-o-Matic is a third-party screen capture recording option. It lets you easily record your screen, webcam, or both. The video is recorded to your local machine, which can then be uploaded directly to Studio.
How to create a recording with Screencast-o-Matic
- In the Global Navigation Menu, select Studio.
- Select ‘Create’ > ‘Screencast-o-Matic’.
- Note: The first time you use it, you may be prompted to download and install the Screen Recorder Launcher.
- Once the recorder opens, you’ll see a small toolbar with settings: Screen, Webcam, or Both
- Size: Set the recording area: full screen, a specific window, or custom size.
- Narration: Choose audio input (e.g. built-in mic or external mic).
- Computer Audio: Select whether or not you want to record computer sounds.
- Select the red Rec button to start recording (you get a 3,2,1 countdown).
- Use the pause button if you need to stop and resume.
- Note the drawing tools available to highlight content while recording.
- Once you have finished your recording, select ‘Stop’.
- After recording, you can:
- Preview the video.
- Add a title (mandatory) and description.
- Trim the beginning/end.
- Access additional editing tools.
- Select ‘Upload’ to upload directly to Canvas Studio. This may take some time, depending on the size of the video.
Further information on using screen recording in Canvas Studio is available at the following Instructure web page: Studio Media Management.
If you want a taster to Canvas Studio, please review the recording of a one-hour FBMH eLearning Digital Discovery webinar: Digital Discovery Series: Canvas Studio.
The FBMH eLearning Team offer an asynchronous version of this training via the Training Catalogue which you can complete at your own pace.
When you share your OneDrive file, select the settings icon (a small cog next to ‘Copy link’), you can select ‘Anyone’ or ‘People in The University of Manchester’, or choose someone to share it with.
You can also select options to allow editing, reviewing, viewing, and downloading using the eye icon next to the name,group or email field.
If you want to explore alternative methods of recording a presentation, check out this guide from the FBMH eLearning Team.
If you need any further support or guidance with any aspects of self-recording, you can contact the eLearning Team at MBChBeLearning@manchester.ac.uk.
eLearning Support
If the filming required is of a higher, ‘broadcast’ quality, such as a one-camera shoot, for use as part of the school’s curriculum, you can contact the eLearning Team at MBChBeLearning@manchester.ac.uk.
eLearning can also provide an editing service on videos, using industry standard software, such as Adobe Premiere.
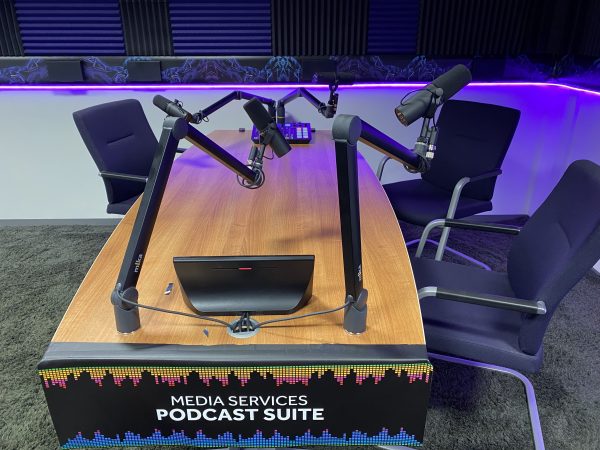
Media Services
If the filming is more complex (group setting/multi-camera) or requires a professional studio and lighting, perhaps for promotional purposes, please contact Media Services.
Specific styles and techniques have been chosen by the University of Manchester to increase the impact of these stories through modern and creative filmmaking. You can review these within the brand guidelines.
There are pros and cons to doing this. It’s always worth re-using where you can.
Just be sure to review the content in line with the current lesson objectives.
Consider that the medical aspect may require updating, but the science may not.
Most of the videos in 1MedLearn can be downloaded to devices to allow easier viewing and usage for the students. The one exception is material that is deemed sensitive. This material is strictly controlled by the eLearning Team. If the video you are adding contains sensitive images, please contact the eLearning Team for advice on how to control these materials.
Can I use videos that I find online?
Verified Sources
JoVE (Journal of Visualized Experiments) provides a rich library of peer-reviewed scientific videos that break down complex procedures and concepts into clear, visual demonstrations. The University of Manchester has an institutional licence for JoVE, which means that you can log-in using single sign-on, or institutional access to view the content. JoVE videos can be embedded into online learning content, as follows:
You may wish to add the patient’s voice to your case or content in order to give the patient’s perspective or to make a condition or disease more relatable than a list of symptoms can. The School of Medical Sciences subscribes to HealthTalk.org contains real people’s stories collected by academic researchers who interview people in their own homes, using their own words. The website has hundreds of video clips with conditions listed alphabetically so are easy to find. Each clip on contains information about the patient, as well as links to transcripts to support learning and accessibility. You can link to these clips directly by copying the URL of the page or you can embed a specific clip into your content, using the above technique. Your video will then look like this:
There are some videos available to staff, and students through Clinical Key Student. Staff/students are required to create a personal account to access content on the ClinicalKey Student site. Select ‘Register now’ to create an account. Once you have generated your account you will be able search for content on the site. Videos can then be linked to content via a URL, as follows: Cranial Nerves. Patton, K.T., Thibodeau, G.A. and Hutton, A. (2019). Anatomy and physiology adapted international edition. Elsevier Health Sciences. Students must have access to ClinicalKey Student in order to view the video.

It may be appropriate to use videos from YouTube, *provided that they have been reviewed and verified by academic/clinical staff. Some recommended authors include :
Because the video is hosted by someone else, it can be taken down by the video owner at any time. It will be up to you to make sure it is still available to the students at the start of every year. Please review videos from external sources regularly.
The University of Manchester Video Portal hosts thousands of videos on a wide array of topics. You can filter the search to view videos by Faculty or School.
Some videos may not be searchable and so it is worth asking colleagues if they have any videos on a particular topic stored on the portal, which you may be able to use.
If the video is hosted by someone else, it can be taken down by the video owner at any time. It will be up to you to make sure it is still available to the students at the start of every year.
Please review videos from external sources regularly.
Top tips
If you are sending materials to eLearning for use on 1Med Learn, include the URL (web address) so they can check the copyright for you.